Blog

  • How DIY Solar Panels Are Changing the Way We Approach Power

    How DIY Solar Panels Are Changing the Way We Approach Power

    Did you ever wonder how you could reduce your electricity bill and help to keep our planet healthy? I used to be afraid of getting into solar but once I learned that solar panels can be DIY’d, everything just clicked. They don’t take a lot of money, they work, and—are you shocked to hear this—they finish possible in one’s hand. Here I am going to tell you absolutely everything I am going to say despite the fact that you might know Nothing. If you are searching for diy solar panels home or desire to install an entire system with a battery backup, don’t worry, I’ll walk you through it.

    diy solar panel

    What Are DIY Solar Panels?

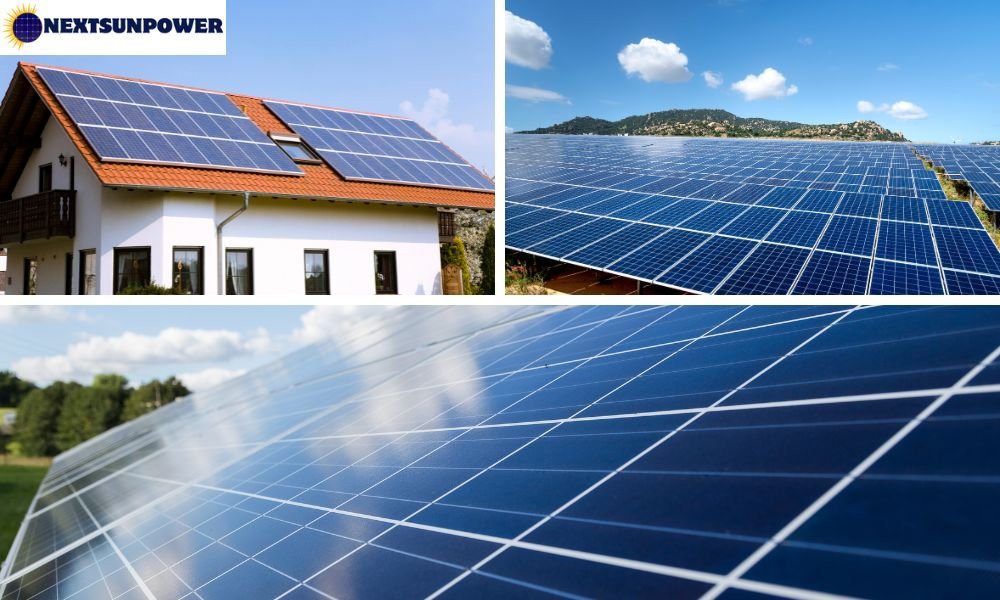
    Do-it-yourself, solar panels refer to solar power systems that you personally install and build rather than hiring a specialist. The systems are able to provide power to anything ranging from small gadgets to your entire house.

    The function of solar panels is to generate electricity from sunlight. They’re perfect for homes, sheds, and cabins & can be installed by individuals with entry-level to mid-skill levels. They’re particularly popular with people who love to do things for themselves and have energy-use control.

    Advantages of DIY Solar Panels

    Doing it yourself to put in solar panels has a fairly substantial number of benefits. First, you will be paying a lot less for labor since it makes up between 10-20% of the price of a professionally installed system. Second, you have the freedom to plan the installation according to your home’s configuration and your energy requirements.

    It’s also a great learning experience. You’ll be able to witness how solar energy works and learn some new things in the process. On a green level, solar panels minimize your carbon footprint and fossil fuel consumption. And even with residential installation, you can still qualify for federal and local solar tax credits.

    Tip: Be sure to review your local codes and utility rules prior to starting out.

    Parts Needed

    Here’s a quick checklist of what you’ll need for your diy solar panels for home setup:

    You will require solar panels to absorb sun rays and transform them into power. The panels need mounting hardware to hold them firmly to the roof or ground. The inverter will turn the direct current (DC) power produced by the panels into alternating current (AC) power consumed in your household.

    Charge controllers govern how your batteries (if any) are charged to avoid overcharging or draining them. Batteries are not necessary but well worth it in the event that you may wish to save energy to use in the evenings or as emergencies. You also need proper wiring and connectors for plugging all of these parts into one complete system.

    Step-by-Step Installation Guide

    Step 1: Calculate Your Energy Requirements

    Begin with checking your past electric bills to enable you to comprehend how much power you use on average. This will make you able to know how much solar panels you need for your system.

    Step 2: Select the Most Efficient Panels

    Select the top-grade diy solar panels depending on quality, guarantee, and usage in energy consumption. Tier 1 panels are durable and have longer lifetimes.

    Step 3: Plan Your System

    Sketch out a layout for where the panels will go. Make sure you receive as much sunlight as you can during the day. You can even use solar calculators online as a guide.

    Step 4: Installing the Mounting Hardware

    Install the mounts or rails first on your surface of choice. Use good alignment tools to make sure everything is aligned and installed correctly.

    Step 5: Install the Panels

    Mount the panels onto the mounted hardware and face them south (in U.S. climates) to capture as much sunlight as available.

    Step 6: Mount the Inverter and Wiring

    Connect your panels into your inverter and your inverter to your main electrical panel. This configuration allows your home to tap electricity from your panels.

    Step 7: Test the System

    Verify voltage and output levels with a multimeter or diagnostic tool. Verify connections are safe and functional before turning your system on completely.

    The whole process may take anywhere from 7–12 hours depending on your system. Design may take 1–2 hours, installation 4–6 hours, and electrical connections another 2–4 hours. A drill, safety harness, wrench, wire stripper, and a multimeter will come in handy.

    Cost Breakdown

    Here below is an estimated minimum 3kW diy solar panels system cost:

    ComponentEstimated Cost
    Solar Panels$1,000 – $3,000
    Inverter$600 – $1,200
    Mounting Kit$300 – $600
    Wiring & Accessories$200 – $400
    Battery (Optional)$1,000 – $3,000 per unit
    Total Cost$5,000 – $7,500

    That is well below what it would cost to have someone do it professionally, between $10,000 and upwards for the same system.

    diy solar panels

    DIY Solar Panels with Battery Storage

    By incorporating a battery storage system to your residential solar project, you are even more self-sufficient. You have the capability of storing extra power during the daytime and using it in the night or even in the case of a blackout.

    Some of the batteries which could be employed include:

    Lead-Acid Batteries: They are the cheapest and most reliable but less durable.

    Lithium-Ion Batteries: They are light and long-lasting but higher upfront cost.

    Saltwater Batteries: They’re toxic-free and green friendly but still a fairly new technology.

    Personally, I installed a lithium-ion battery in my system last year. It’s been wonderful for outages. If you’ve got a heavy outage region or simply want a bit of added peace of mind, I highly recommend exploring diy solar panels with battery storage.

    Maintenance Tips

    To maintain your home-made solar panel system in working order, wash the panels every 3–6 months so that dust and debris will have no opportunity to accumulate. Inspect wiring and connections on a regular basis for wear. Many inverters include a built-in monitoring app—use it to monitor your system output.

    And if you have batteries, don’t forget to recharge them occasionally. All of them will last 5-10 years before they need to be replaced.

    Typical Errors to Prevent

    Disregarding Permits: Always stay aware of the local building regulations and obtain the necessary permits.

    Proper Installation: Mount panels in an area which receives a consistent beam of sunlight.

    Management of Energy Needs Inadequately: Budget your energy usage and round up not to fool yourself.

    Incorrect Installation: Recheck everything and refer to your books or call an approved electrician.

    By Avoiding these common mistakes will definietly save you money, time, and frustration.

    FAQs

    Q1: Legally, can I install solar panels myself?

    Yes, normally. Simply observe local building regulations and permit procedures.

    Q2: Are do-it-yourself solar panels safe?

    Yes, if installed correctly and wearing safety equipment.

    Q3: How long do do-it-yourself solar panels last?

    The good ones will last for 25–30 years with proper maintenance. 

    Q4: Do I need batteries with my system?

    Not necessarily, but diy solar panels with battery backup provide back-up power and more flexibility. 

    Q5: What is the best diy solar panels to buy?

    Use panels with high efficiency rate, long warranty, and good review from actual users. 

    Conclusion

    Taking the DIY solar panel option was one of the best decisions I ever made. It was cost-effective, it was a learning experience, and it gave me peace of mind. If you are serious about energy autonomy and saving the planet, I tell you to do it.

    Whether you’re powering a small shed or your whole home, diy solar panels for home offer real benefits that last for decades. Combine that with diy solar panels with battery storage, and you’ve got an energy solution that’s smart, sustainable, and secure.


  • How Can Be a 100 Watt Solar Panels Helpful For Your Home

    How Can Be a 100 Watt Solar Panels Helpful For Your Home

    All the most beneficial and most in-demand solutions that there are these days in the market, perhaps the most comprehensive solution is a 100 watt solar panel. For the homeowner of a residential house who wants to cut down on the expense of electricity or for the recreational camper who wants to enjoy electricity off-grid, it is every cent worth learning what a 100 watt solar panel can do.

    What is a 100 Watt Solar Panel

    A 100 watt solar panel can produce a maximum of 100 watts of power when subjected to direct sunlight. It is light, universal, and portable to meet all your requirements, ranging from energizing a low voltage application to charging simple devices for the entire camp outing.

    100 watt solar panel

    How Much Power a 100 Watt Solar Panel Produce

    Under a favourable conditions, a 100 watt solar panel will yield:

    • 400-600 watt-hours per day (4-6 direct sun hours)
    • 12-18 kWh per month
    • 146-219 kWh per year​

    Power Output is affected by:

    • Sunlight Intensity: More sun = more power.
    • Panel Orientation and Tilt: Face directly towards the sun.
    • Temperature: Low temperatures will perform better but too much heat will lead to loss of efficiency.
    • Shading: Any shadowing will result in massive output loss.
    100 watt solar panel

    What a 100 Watt Solar Panel Can Power

    A 100 watt solar panel can power many appliances and devices. The below list:

    Device/AppliancePower ConsumptionUsage Time (Approx.)
    LED Light Bulb10W40–60 hours
    Smartphone5WMultiple charges
    Laptop50W1–2 charges
    Portable Fan20W20–30 hours
    Mini Fridge60W6–10 hours
    Wi-Fi Router10W40–60 hours
    Tablet15WMultiple charges
    Camera Battery Charger10WMultiple charges

    Note to remember: Actual usage time subject to sun availability and battery storage capacity.

    Top 100 Watt Solar Panel Kits

    Select the following top-rated kits when purchasing the best 100 watt solar panel:

    BrandFeaturesIdeal For
    RenogyLong life, compact size, easy installationRVs, boats, off-grid setups
    JackeryLightweight, built-in battery, easy operationCamping, emergency power backup
    Eco-WorthyLow price, starter kit and controllerStarters, small systems
    Goal ZeroFoldable, portable, universalBackpackers, travelers
    HQSTPortable, rust-proof, heavy dutyOutdoor uses

    Always include in the package such necessities as charge controllers, inverters, and mounts.

    Advantage of Having a 100 Watt Solar Panel

    Portability: Light in weight and easy to install, and perfect for outdoor use.

    Low Cost: Solar power at affordable prices can surely reduce the electricity bills.

    Environmental Advantages: Reduced carbon footprints due to the excess use of clean renewable energy.

    Multi-Purpose Application: It can be used for various purposes ranging from powering devices to powering machinery. 

    Growable: Growable as per the requirement of power required by using numerous panels at intervals. 

    FAQs

    Q1: Is it possible to power a fridge to use a 100 watt solar panel?

    Any standard fridge will draw more power than a 100 watt panel can supply. A mini-fridge or optimized fridge can be charged temporarily, however, particularly if removed from a battery bank.

    Q2: Charging time for a 12V battery using a 100 watt solar panel

    Direct sun will take around 6-8 hours to fully charge a 12V battery based on panel and battery efficiency.

    Q3: Is a 100 watt solar panel sufficient for home use?

    A home would seek to buy the entire solar system in terms of higher-capacity panels in the sense that one would be able to utilize a 100 watt panel in the home.

    Q4: What is included in a 100 watt solar panel kit?

    All the kits have a charge controller, brackets, solar panel, and some of them have an inverter included with them too. Do read product reviews and see if it will be able to serve your specific purpose or not.

    Q5: Will 100-watt panels be stackable?

    Yes, if you can connect a series of panels to one another in series or parallel configurations, you can have an aggregate higher power output that is going to be sufficient to power more appliances or charge bigger batteries.

  • The Bifacial Solar Panels: How They Work, and Why They Matter

    The Bifacial Solar Panels: How They Work, and Why They Matter

    Solar power is revolutionizing the way we are energizing homes and businesses, and leading the pack in the revolution is bifacial solar panels. Unlike traditional panels, which receive sunlight on their front side, bifacial panels receive sunlight on both their front and back sides and therefore are two-functional and efficient. In this article, We will learn How bifacial solar panel Work, their Pros and Cons, and how they could be a game-changer as far as renewable energy is concerned..

    bifacial solar panel

    What are Bifacial Solar Panels?

    Best bifacial solar panels are able to Seize the light on both sides of the panel, front and rear. Their two-sided construction equips them with a role of collecting direct sun rays both in front and at the back and illumination from reflection on other surfaces such as water, soil, or even surrounding structures and endows them with their capacity of collecting even more power. They obtain what reflects on other surfaces, to receive illumination as light comes bouncing towards them back to enable them to be very efficient. 

    How Do They Work?

    Half of the bifacial panel is under direct sunlight and the other half is under reflected light from the environment.” The configuration can generate more electricity than the traditional monofacial panels, particularly in the case of high reflectivity.

    Benefit of Bifacial Solar Panels

    1. More Energy Output

    Bifacial panels generate 30% more power than a normal panel, varying with installation and conditions. Both sides of the panel can harness light and generate electricity, particularly in reflective conditions.​

    2. Space Efficiency

    These solar panel are of suitable size for the space available in the room. Their increased efficiency enables you to get the same with fewer numbers of panels, hence saving space and, in certain situations, reducing the installation cost.

    3. Longevity

    Double glass is favored by bifacial panels, thus being double strength and climate condition-proof, i.e., wind and snow. This design can lead to extended lifespan and reduced maintenance cost.

    4. Looks

    Open bifacial panel design can appear more elegant, particularly where looks are a matter of concern, i.e., on building or office roof tops, Homes

    Drawbacks of Bifacial Solar Panels

    1. Higher Initial Investment

    Bifacial Solar panels are more costly than regular panels due to intricate design and material. 

    2. Installation Issues

    Installation of bifacial panels must be well planned so that they become highly efficient. Tilt, height these are must be taken into account.

    3. Based on Reflecting Surfaces

    Backside energy gain is dependent upon base surface reflectance. In low albedo (reflective) conditions, extra energy gain will be zero.

    4. Maintenance

    Both sides of the panel need to be maintained clean for efficiency, and they can be used as maintenance work along with regular panels.

    Vertical Bifacial Solar Panels

    East and west direction facing vertically mounted bifacial solar panels receive sunlight in the morning and evening. This type of orientation would be extremely useful in certain climatic conditions.

    Advantages of Vertical Installation

    Space Optimization: Vertical panels are straightforward to retrofit into fence or divider and therefore are best suited for space with less space.​

    Less Soiling: Installed higher, they reduce dust and snow soiling, reducing maintenance needs.

    Increased Energy Yield: Gathering energy from the sun at more than one location in a day provides a more consistent energy yield.

    Top Bifacial Solar Panels

    When selecting the best bifacial solar panel, a few things to consider are efficiency, lifespan, and company reputation. Some of the best ones are:

    • LG NeON 2 BiFacial: Efficient and extremely durable.
    • LONGi Hi-MO4: Provides the best performance even during unstable conditions.
    • Canadian Solar BiKu: Provides good value for money with the best performance.
    • Trina Solar Duomax Twin: Provides Long Lasting build with ability to endure tough weather.
    • Jinko Solar Swan: Gives high level energy output with latest technology.

    FAQs

    Q1:How are bifacial solar panels work?

    A: Solar panels that are able to catch light on the both sides and generate more electricity than standard panels that’s how bifacial solar panel work.

    Q2: Are bifacial panels well suited for household usage? 

    A: Yes, if the mounting surface is with reflective surfaces such as white roof or ground cover.

    Q3: What additional energy do bifacial panels deliver?

    A: 30% more energy, subject to installation and climatic conditions.

    Q4: Is bifacial more maintenance intensive?

    A: Not much, as both sides have to be clean so that they can work to their optimum levels.

    Q5: Is vertical bifacial superior to conventional installations?

    A: Horizontal or vertical installation can be superior in some cases, i.e., limited space or very high morning and evening sun points.

    Conclusion

    Bifacial panels are a game-changer for solar, maximizing use and efficiency. More costly to install and more complicated, their benefits in the long term may be worth these negatives. Knowing what are bifacial solar panels and how they may be utilized can help you make the ideal decision for your energy requirements

  • A Master Guide For a Motorhome with Solar Panels  

    A Master Guide For a Motorhome with Solar Panels  

    Imagine waking up to the peace of nature without listening to the sounds of generators or the requirement for electric hookups. A motorhome with solar panels, this Vision becomes a real word now,, providing liberty, sustainability, and frugality. Let us examine how combining solar power with your motorhome can change your travel experience.

    image credits: bluetti

    Why a Motorhome with Solar Panels?

    1. Embrace Energy Independence

    Being completely reliant on campground power can be limiting. Solar panels provide the liberty to generate your own power, meaning off-grid camping without sacrificing any comfort. With such liberty, you have the liberty to go wherever power may not be available.​

    1. Significant Cost Savings

    Although the installation cost of solar panels seems too expensive at first, long-term savings are enormous. With this process, you save money over time by eliminating or reducing fuel-operated generators and wired electrical connections. They also have low maintenance costs, which again reduces the repeat cost.

    1. Environmentally Friendly Travel

    Solar panels are mounted on motorhome holidays to minimize your carbon footprint. Solar power is renewable and clean, less dependent on fossil fuels and the emission of greenhouse gases. This clean means of transport is in line with the increasing demand for green travel.

    1. Peaceful and Quiet Camping

    Generators are noisy and obtrusive, generally prohibited in most campsites. They are silent, maintaining the peace and quiet of your environment and further improving your camping experience .​

    1. Resale Value Increase

    Placing solar panels on your motorhome increases its worth if sold and desired. Increasing numbers of travelers prefer to travel using environmentally friendly modes, and an RV with a solar power installation will be an extremely desirable selling feature, maybe even more of a return on investment.

    solar panel for motorhome

    Learning About Motorhome Solar Panel Systems

    A typical motorhome solar panel system consists of many vital parts:

    Solar Panels: This Emphasis on capturing and using the sun’s power.

    Charge Controller: Control the current energy and generated voltage from the panels to the batteries to deter overcharging.

    Batteries: Store electricity to use later.

    Inverter: Converts stored DC power to AC power to be used by standard appliances.​

    RV Solar Power – Expert Advice

    They all play together to provide an easy and efficient source of power for your motorhome.​

    Installation Insights

    You can install solar panels on your motorhome in the following steps:

    Calculate Your Energy Requirements: Calculate the energy you require to appropriately size your system.

    Choose Your Panels: Choose flexible or rigid panels based on available space on your roof and your preference.

    Mounting: Mount panels on your roof in a manner that they receive maximum sunlight. Tighten them for a long lifespan.

    Wiring and Connections: Wire panels to charge controller, batteries, and inverter following safety guidelines. For lifeonroute.com

    It is recommended that a motorhome expert install system’s properly and optimize them. 

    Maintenance Tips

    Maintenance of your solar panels motorhome system guarantees deep rooted and performance:

    Regular Cleaning: Clean the panels regularly from dust to ensure maximum performance.

    Check Connections:  Keep a Check wiring and mounts for damage periodically. 

    Check Performance: Keep energy generation under close supervision to identify any problem at an early stage.​

    With minimal effort, your solar system will provide steady power in the future.​ 

    Frequently Asked Question About Motorhome

    Q1: How much it cost to install solar panels on a motorhome?

    A: Varies by system size and materials but typically around $1,500 and $3,000.​

    Q2: Will solar be able to power all of my appliances?

    A: Solar is capable of powering any appliance, yet high-power appliances like air conditioners will require other power resources or more advanced systems.​

    Q3: Can I install solar panels myself?

    A: While you can install solar panels yourself if you are familiar with electricity, you should have a motor home specialist install them so you obtain the best possible outcome.​

    Q4: How long will solar panels last?

    A: Solar panels that are well looked after with good quality last 25 years and beyond.​

    Q5: Do solar panels work on cloudy days?

    A: Yes, though less so. Panels continue to generate power but at reduced levels.​

    Conclusion 

    Purchasing a motorhome with solar panels is of much benefit, from saving money and energy independence through to eco-friendly traveling. With knowledge of the components, how they’re installed, and what they require in maintenance, you’ll be able to make smart choices and get maximum benefit from your RV vacations. Having a professional motorhome6 consultant come by will also have your system designed with your specific requirements in mind, paving the way for hundreds of great trips powered by the sun.

  • 400 Watt Solar Panels: The definitive Guide

    400 Watt Solar Panels: The definitive Guide

    What Are 400 Watt Solar Panels?

    400 watt solar panels are high capacity solar panels which, in standard test conditions, have the capability to produce 400 watts of electricity. They are heavier in weight and larger in size than panels designed for use in the home and would be best suited for individuals who would need more power with less space.

    They are a perfect option if you would prefer to reduce your cost of electricity or begin a small do-it-yourself solar business. These are being chosen by the majority of U.S. residences as their roof, RV, or cabin mount.

    Image credits: Ecoflow.com

    Perks of 400 Watt Solar Panels

    The only benefit of 400 watt solar panels is that you get more. You get more electricity per panel, and thus you end up using fewer panels in total. That is a big benefit if roof space or land space is restricted.

    Since you are using fewer panels, you are also conserving installation hardware and labor and hence the entire installation turns out to be cost-saving in the long run. The Solar panel are particularly suitable for small spaces and can be integrated fairly easily with battery storage systems, providing you with greater convenience in case of outages or nighttime use.

    How Much Do 400 Watt Solar Panels Cost

    This is probably the most asked question: how much 400 watt solar panels?

    It varies greatly depending on factors such as the company, panel quality, and bulk order. Budget models are $120 to $180 per panel. Mid-range brands are $180 to $250, and premium and high-efficiency brands are $250 to $350 per panel.

    So, if you’re still unclear about how much 400 watt solar panels cost, you’re already getting charged $0.30 to $0.60 per watt for the panels by themselves. Getting them installed will run $0.75 to $1.25 per watt depending on where you live and who you pay to install them.

    How Many 400 Watt Solar Panels Do I Need for my Home

    The number of solar panels depends upon your power usage. For example, if your home is consuming approx 300 kWh electricity monthly, your daily usage would be around 10 kWh. As one 400W panel would provide you with about 1.6 to 2.5 kWh depending upon sun, you would require around 9 panels.

    According to 600 kWh per month consumption (20 kWh per day),  then I would have roughly about 19 solar panels. According to 900 kWh per month consumption (30 kWh per day consumption), I would have nearly 28 panels. So, the number of 400 watt solar panels I would need will depend on daily consumption of energy and on sun exposure where I am.

    image credits: sunpower

    Case Study

    Let’s say you’re a family of four living in California with a monthly usage of 800 kWh. In that case, you’d likely need between 25 to 28 panels. Now compare that to someone in Florida, where there’s more sunlight—they might get by with fewer panels for the same energy output.

    Or, if you’re off-grid on a small house or one cabin and using just perhaps 300 kWh of electricity annually, you should be able to get by on as few as 9 to 10 panels.

    Installation: What You Can Expect

    Installation of solar panels of 400 watts is usually trouble-free and straightforward.

    Then a solar panel installer will visit your roof or ground and check to see if even an option is feasible. Then they will get an idea of how many panels you will have and deal with permits that are associated with them. Then, they add bracketry, panel mounting, and all hardware onto your inverter and battery system (if you can even get them).

    Installation can be finished in 1 to 3 days depending on system size. Two or three quotes from installers will be a good idea so one can compare prices and services. 

    DIY vs. Professional Installation

    If you’re the type who works weekends, then your best option would probably be a DIY installation. It’s less expensive because you’re not shelling out for labor and it also fits well for RVs or very tiny off-grid systems.

    However, DIY involves proper knowledge of solar wiring and safety procedures involved. professional installers arrange permits and inspections through equipment installation. This is usually the way to go with full-house installations where efficiency and safety are involved.

    Battery Storage with 400 watt Solar Panels

    Adding battery storage to your home solar system is becoming more popular year by year. The 400 watt solar panels with batteries enable you to save electricity for use during nighttime or as backup in the event of an electricity blackout.

    Home owners have different battery solutions. Tesla Powerwall type of lithium-ion batteries have 13.5 kWh capacity and they cost between $9,000 and $12,000. AGM deep cycle batteries are less expensive with around 100Ah capacity and they cost between $200 and $400. LiFePO4 portable batteries are also used for backup or off-grid functions and they cost between $800 and $2,000 based on capacity.

    This degree of freedom from the power of authority is a behemoth benefit to households that are going through blackouts every other day or have no power at all and nothing else.

    Environmental Impact

    Installation of the 400-watt solar panels is an inexpensive way of cutting your carbon footprint. Each panel keeps about 200 pounds of CO2 a year out of the air. For each 20 installations, you’re keeping some 4,000 pounds a year out.

    That’s like planting about 45 trees per year. Not only a cheapster—although that—that’s a great world citizen too.

    Popular Brands to Purchase

    If solar panels equal time to do is considered, brand matters. SunPower panels are best performance of 22.8% and 25-year warranty. Q Cells is also great, 20.3% efficiency, but same 25-year warranty at lower price.

    REC panels are a decent compromise at 21.7% efficiency but at Canadian Solar’s best value choice at 19.9% efficiency and 12-25 year warranty. Always buy after reading reviews and warranty conditions.

    FAQs about 400 Watt Solar Panels

    1. how much are 400 watt solar panels suitable for your home installation in residential homes?

    Yes! They are perfect for small and large homes, especially where space is limited.

    2. Can they be installed on RVs or small homes?

    Yes, they have a high output and are perfect for off-grid use or mobile 

    3. How much does a 400 watt solar panel cost to install?

    Per panel with installation Cost is $450 to $750 depending on your location.

    4. How long will the panels last?

    They all come with 25–30 year warranties and will just keep on going even longer.

    5. Do they work on overcast days?

    Yes, but hardly so. Battery storage can bridge the gap.

    Conclusion

    If solar is a key issue to you, 400 watt solar panels provide an ideal middle ground of performance, small footprint, and lasting value. New system installation or replacement for an existing system is simple and effective with these panels to make the transition to clean energy.

    Still curious about how many 400 watt solar panels you would need or how expensive are 400 watt solar panels? Call a solar technician—or better still.